bookmark_borderMove a M365 Mailbox to another database server

If you need to move a specific mailbox in Microsoft 365 to a different database server, Powershell is your friend. Open a Powershell session and connect to your Microsoft 365 tenant. If you dont know how to connect to M365 via Powershell, check out the last paragraph in this article: Powershell on Linux

First we should check the actual database server the mailbox is located on:

Get-MailboxLocation -Identity user@domain.com
cmdlet Get-MailboxLocation

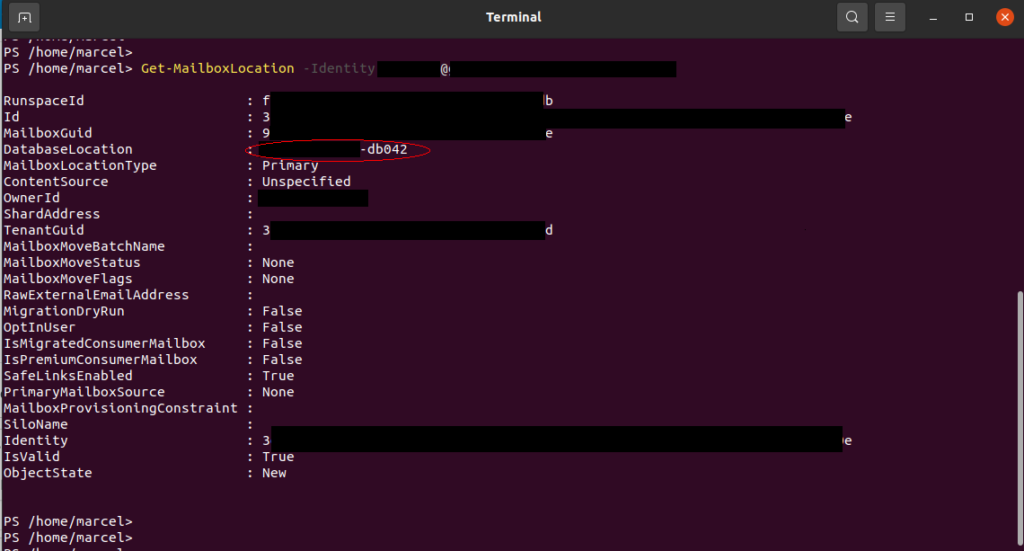
As you can see in the above image, the field “DatabaseLocation” shows the hostname of our database server. We are now going to set up a move request for this mailbox. In Microsoft 365 / Exchange Online we are not able to chose the desired server we want to move our mailbox to. Microsoft will move the mailbox to a random, different server:

New-MoveRequest -Identity user@domain.com
cmdlet New-MoveRequest

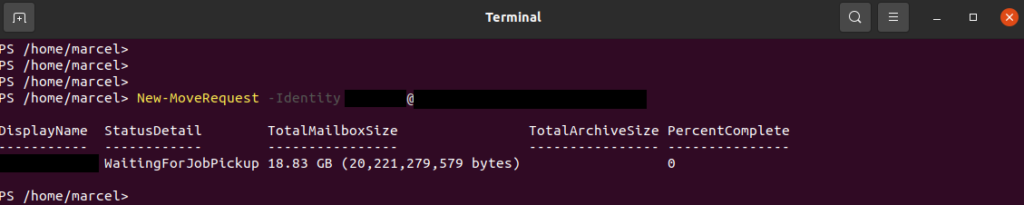
Once we created the move request we need to wait for the moving provess to finish. We are able to check the status with the following command:

Get-MoveRequestStatistics -Identity user@domain.com
cmdlet Get-MoveRequestStatistics, status CreatingFolderHierarchy
cmdlet Get-MoveRequestStatistics, status CopyingMessages

It took this 18GB mailbox about1.5 hours to finish. That depends most likely on the usage of source and destination server. After this operation has finished the user should restart their Outlook.

bookmark_borderPowershell on Linux

Did you know Powershell is available for Linux too? Sometimes you need the Windows Powershell features available on your Linux machine, e.g. for M365, Exchange Online or Azure AD administration. Powershell can be easily installed but not all features are available.

Linux derivates officially supported for Powershell 7.1:

  • Ubuntu 16.04/18.04/20.04
  • Ubuntu 19.10 (via snap-packages)
  • Debian 9/10
  • CentOS/RHEL 7/8
  • Fedora 30
  • Alpine (from 3.11)

Installation example (Ubuntu 20.04)

You can directly install Powershell via repository:

# Update the list of packages
sudo apt-get update
# Install pre-requisite packages.
sudo apt-get install -y wget apt-transport-https software-properties-common
# Download the Microsoft repository GPG keys
wget -q https://packages.microsoft.com/config/ubuntu/20.04/packages-microsoft-prod.deb
# Register the Microsoft repository GPG keys
sudo dpkg -i packages-microsoft-prod.deb
# Update the list of products
sudo apt-get update
# Enable the "universe" repositories
sudo add-apt-repository universe
# Install PowerShell
sudo apt-get install -y powershell
# Start PowerShell
pwsh

Connect to Office 365 Powershell

After Powershell has been installed, it’s very easy to connect to Office 365. Open the Powershell terminal and type the following (First step will ask for O365 admin credentials)

$O365Credential = Get-Credential

$Session = New-PSSession -ConfigurationName Microsoft.Exchange -ConnectionUri https://outlook.office365.com/powershell-liveid/ -Credential $O365Credential -Authentication Basic -AllowRedirection

Import-PSSession -Session $Session

The last step takes a few seconds until the Office 365 session has been imported. Afterwards you can run the available Powershell cmdlets.